Short guides: what to do step by step, and what to do when something isn't working. Can't find your answer? Send us a ticket — we'll get back to you.
Start — your first day
The Start page has a list of steps that lead to a working website. Steps tick themselves off as you do them — you don't check anything by hand. Next to each step that's not done yet there's a button that takes you exactly where you need to go.
What to do on day one
- Create your website: pick your industry and a template, and the wizard will prepare texts and photos for you to tweak.
- Edit the texts so they sound like you and your business.
- Upload your logo or a photo of your business.
- Add your phone number or email so customers can get in touch.
- Click “Publish” — your website goes live right away at your-name.pageforyou.pl.
- Optional: connect your own domain (e.g. yourcompany.com) and pay for a plan in “Payments”.
What if…
I did a step but it's not ticked off
Steps check themselves and sometimes need a moment. Refresh the Start page. If the step still isn't ticked after a few minutes, send us a ticket and we'll take a look.
I don't know where to start
Start with the first unticked step on the list and click the button next to it. You can deal with the rest later — your website works as soon as it's published.
I can't see databases, files or SSH in the menu
They're under “Hosting” — each tool has its own tab there. You don't need them to run your website.
The builder and your free preview
You see your website before you pay anything. Type your business name and industry, and the builder puts together a preview with texts and photos that fit your industry. The preview is free and needs no account. Every “Create a free preview” button on pageforyou.pl opens the same builder — whatever you have already typed stays there.
How it works
- Click “Create a free preview”. On a phone, the form is right at the top of the home page.
- Type your business name, town and industry — just start typing and we will suggest a match.
- Pick a look. The thumbnails show a website for your industry, not a random example. The names are simple: “Modern”, “Local”, “Minimal” and more. You compare colours and fonts on a sample text.
- Look at the preview. On a phone, tap “View full screen” — you see the real phone view, not a shrunken desktop.
- Like it? Click “Create an account and order a plan”. Once paid, your website is built from the same choices, and you polish the texts and photos in the editor.
What to do if…
I closed the tab — is what I typed gone?
No. The builder keeps it in your browser for 24 hours. Come back to pageforyou.pl on the same device and click “Create a free preview”.
The preview link stopped working
The free preview is temporary — we delete it after 24 hours. A new one takes a few seconds and is free as well.
The builder did not load
Usually a short internet hiccup. Click “Try again” — the rest of the page keeps working and you lose nothing.
The preview has reviews and prices I do not know
These are examples, labelled “Sample review” and “Sample prices”. See “Sample reviews and prices in templates” below.
I want a different look
Go back to the look step in the builder and pick another one. After you sign up, you change the section layout in the editor; for a completely different template, create a new website.
My website — texts, photos, publishing
In “My website” you change the texts, photos and look of your website. Changes are saved in the editor, but visitors only see them after you click “Publish”. So you can edit at your own pace — the version online is the one you approved.
How to change your website
- Go to “My website” and click the pencil (Edit) next to your site.
- “Content” tab: pick a section and edit the texts.
- Photos: click a photo spot and upload a new one or pick one from the library (JPG, PNG or WebP).
- “Design” tab: colors and fonts. To change a section’s layout, use the “Layout” button in “Content”.
- “Preview” shows how your website will look. When everything's right, click “Publish”.
What if…
I changed some text but it's not on my website
Changes only go online after you click “Publish” in the editor. If you've already published, refresh the page in your browser — it sometimes shows an old saved version.
What do I see, and what do my customers see?
In the editor and in “Preview” you see your draft. Customers see the last published version at your website's address — the same one the “View website” button on Start opens.
Someone filled in the contact form — where do I find it?
In the website editor, on the “Messages” tab. The counter on the tab shows new messages.
A photo won't upload
Check that it's a JPG, PNG or WebP file. Photos straight from a camera can be very large — make it smaller and try again. If it still doesn't work, send us a ticket.
I want to start over with a different template
In “My website” click “New site” and pick another template (if your plan allows another website). Delete the old one once the new one is ready.
Where did the privacy policy and terms on my website come from?
Legal documents (privacy policy, terms and conditions, GDPR clause) are created automatically with your website — with your business details, in your website's language, at no extra cost. Links to them are in the footer, next to the contact form and in the cookie notice. You can change your business details and the text in the website editor: “Add-ons” tab → “Legal documents”.
Sample reviews and prices in templates
A new website comes with ready-made texts, so you never start from a blank page. Customer reviews and prices in it are only examples: in previews they are labelled “Sample review” and “Sample prices”, and in the editor they have an “Example” frame. Until you change them, they do not appear on your published website — we never publish made-up reviews or prices in your name.
How to add your own
- In “My website”, click the pencil (Edit) and open the “Content” tab.
- Choose the reviews or pricing section — sample fields have an “Example” frame.
- Type real reviews from your customers (with their consent) and your own prices. Any field you change is no longer a sample.
- Click “Publish” — the section appears on your website.
What to do if…
I have no reviews yet
Do nothing. The reviews section will not appear on your website until you add real ones.
I do not want to show prices
Leave the pricing as it is — sample prices never reach your website. In a service description you can write, for example, “priced individually”.
My published website has no reviews
They are probably still samples. Open the section in the editor: if you see the “Example” frame, change the text and click “Publish” again.
Can I use reviews from Google?
Yes, if they are real reviews from your customers. Sign them with the name or initials shown in the source.
Logo — where it comes from and how to change it
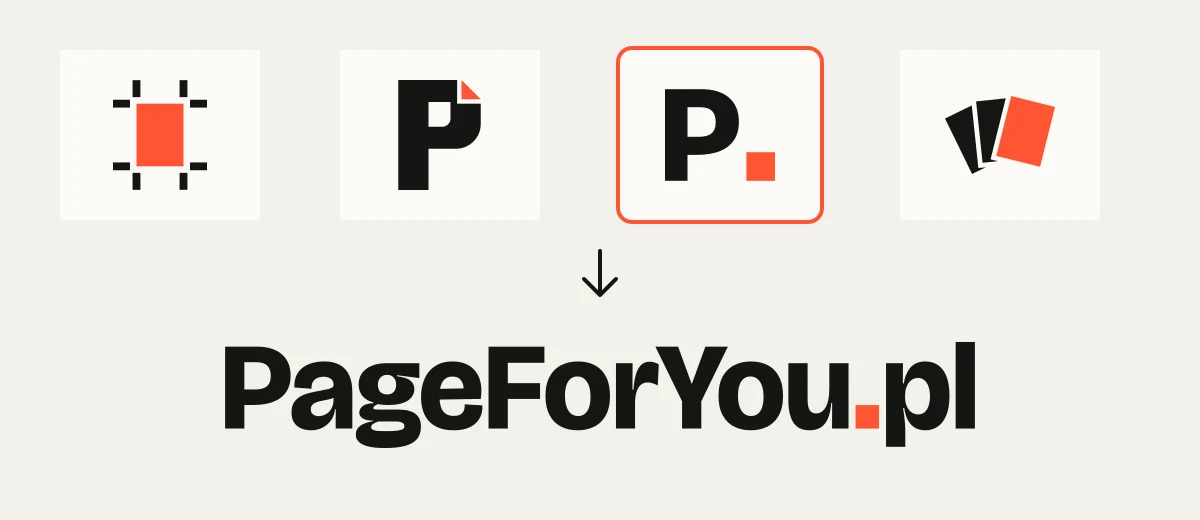
At first, your site header shows a symbol of your industry. You can replace it with one of three logos we prepare from your business name: industry symbol with the name, a monogram of your initials with the name, or the name alone with a single accent in your site colour. The proper name is set large and descriptive words (e.g. “law office”) as a small line beside it. The chosen logo goes into the header, the footer and the browser tab icon.
How to choose or change the logo
- In the site wizard, in the “Design” step, click the proposal you like (or skip it).
- Later: “My site” → pencil next to the site → “Settings” tab → “Logo” section.
- Pick the symbol colour and a proposal, then “Use as site logo”. The site refreshes by itself.
- The SVG, PNG and Icon buttons download files — for business cards, print or social media profiles.
- Have your own logo? Click “Upload your own” — it replaces the proposal.
What to do if…
None of the proposals fits
Change the symbol colour or the site design (“Design” tab) — proposals take the typeface and colours from the chosen design. You can also keep the industry symbol or upload your own logo.
I changed my business name
Proposals are made from the site name. After renaming, go to “Settings” → “Logo” and choose a proposal again.
The footer shows “Icons: game-icons.net”
The symbol in your logo comes from a free collection whose licence requires an author credit. The credit disappears when you choose another proposal or your own logo.
I want the industry symbol back
In the “Logo” section click “Remove logo”.
An honest word about trademarks: a proposed logo is yours to use, but it can't be registered at the patent office because it consists of publicly available elements (a free icon, a popular typeface). To register a brand, order an individual design from a graphic designer.
Designing a logo for your business — where to start
A good logo doesn't have to be complicated. It should be recognisable in a second: in a browser tab, in your site menu, on a business card and on your social media profile. Start with three decisions: the name, the character of your business (calm, crafty, modern) and the one colour that will make it stand out.
Where your logo has to work — check every place
- Browser tab icon (16 and 32 pixels) — usually only the first letter or a symbol survives here.
- Site menu and footer — the logo is small, so thin lines and tiny text disappear.
- Business card and letterhead — print, often in one colour.
- Social media profile picture — the symbol cropped to a circle.
- Dark background — you need a light version of the logo.
- One-colour version — for a stamp, engraving or sticker.
Simple rules that make a difference
- One typeface. Mixing several typefaces looks accidental.
- One accent colour, the rest black or white. Put the accent in one place, e.g. on a dot or the first letter.
- Check the logo at 16 pixels. If it's unreadable, prepare a separate small symbol, e.g. the first letter.
- Avoid any resemblance to well-known brands, even accidental. Show the logo to a few people and ask what it reminds them of.
- Prepare a full set of files: horizontal logo, symbol only, a version for dark backgrounds and a one-colour one (ideally SVG and PNG).
How to upload a logo to your PageForYou site
I already have a logo
Go to “My site” → pencil next to your site → “Settings” → “Logo” and click “Upload your own”. An SVG file or a PNG with a transparent background works best. The logo will appear in the header, the footer and as the browser tab icon.
I don't have a logo yet
In the same “Logo” section you'll find three suggestions made from your business name. Pick one and download the SVG, PNG and icon files with one click.
My logo has a white box around it
The file has a white background saved in it. Ask your designer for a PNG with a transparent background or an SVG and upload it again.
An honest word about trademarks: only an original logo can be registered. That usually takes an individual design by a graphic designer and a check that no similar mark is already filed with the Polish Patent Office (UPRP) or the EU office EUIPO. You're free to use the suggestions from the builder, but they can't be registered as a trademark.
Domains
Add subdomains (name.pageforyou.pl) or custom domains (yourcompany.com). Subdomains work instantly. Custom domains require DNS verification (TXT record) and pointing to our server.
Adding a domain
- Click 'Add domain'
- Enter domain name and target port
- For subdomains — works immediately
- For custom domains — add TXT record to DNS
- Click 'Verify' when record is ready
- After verification, order SSL certificate with one click
What to do in your case
You bought the domain from us
Nothing to do. Address, certificate and e-mail are set automatically.
Domain and hosting at one company
Two entries are added in that company’s panel; we show them on the domain card. If you’d rather not, click “Do it for me” and we will guide you or set it up together.
Domain at one company, website or e-mail at another
Entries go where the domain’s name servers are, not necessarily where you bought it. The domain card shows which company that is. If in doubt, “Do it for me”.
Your provider only offers “redirect to address”
A redirect is not enough; a certificate cannot be issued on it. Change the domain’s name servers at that provider to ns1.pageforyou.pl and ns2.pageforyou.pl and we will set the rest. Report it with the button on the domain card.
You don’t have a domain yet
Easiest: buy it from us in the wizard, everything works right away. You can also buy it anywhere and come back to one of the points above.
You use e-mail on this domain
It is safe. We only change the website entry and never touch e-mail entries. Do not change MX records.
You have an IT person
The domain card has a “Send to your IT person” link with a ready instruction. They will know what to do.
How long does it take
Usually within an hour of entering the settings, sometimes up to a day. We issue the certificate ourselves after verification, nothing to click.
Someone already added your domain
It happens by typo or on purpose. If that request was never confirmed, when adding you will see one TXT record to add at your domain provider — after that the domain moves to your account. If the domain is already confirmed on another account, write to us via a ticket.
Transferring your domain to us
Have a domain with another company? Transfer it to us — your site, email and renewals in one place. A .pl domain moves for 0 PLN and keeps its expiry date; after that you renew with us for 122.94 PLN a year. .com, .eu and similar cost one year's renewal (e.g. .com 61.44 PLN, .eu 28.23 PLN) and gain a year.
What to prepare
- Transfer code (AuthInfo) — your current domain company gives it to you
- Access to the domain holder's email — the approval request goes there
- A phone number
- Completed billing details in the panel
How to do it
- In the panel open “Domains” and click “Transfer your domain to us”.
- Enter the domain and click “Check” — you'll see the price and expiry date.
- Paste the transfer code, add your phone, tick the consent and send.
- Click the link in the email sent to the domain holder.
- Done — the domain lands in your account and, if you ticked it, starts pointing to your site.
What to do in your situation
How long it takes
Usually from a few minutes to a few days, depending on your current company. You can follow it in the panel on the “Domains” page.
Your email is with your current company
When transferring, don't tick “connect the domain to my site and email”. Your email keeps working as before. When you want to move your mailboxes to us, open a ticket — we'll switch the domain for you.
Will my site stop working
No. Everything works as before until the transfer is done. If you tick the connection, after the transfer the domain starts pointing to your site with us.
The domain is about to expire
We can't transfer a domain online right before or after its expiry date. Renew it with your current company first, then come back.
My current company won't give me the code
They must give the code to the domain holder. If they're dragging their feet, write to us — we'll tell you what to do.
The code didn't work
On the “Domains” page click “Enter code again” next to the domain. Paste the code exactly as you got it — no spaces at the start or end.
The transfer code works like a key to your domain. Only enter it in the panel and never email it to anyone.
Sign up and transfer your domainEmail — mailboxes on your domain
You can have addresses on your own domain, e.g. office@yourcompany.com. Read your email in the browser (Webmail), on your phone or in Outlook — you'll see the same messages everywhere.
Settings for your phone and Outlook
- Account type: IMAP
- Username: your full email address (e.g. office@yourcompany.com), password: your mailbox password
- Incoming mail: mail.pageforyou.pl, port 993, SSL
- Outgoing mail: mail.pageforyou.pl, port 465, SSL (or port 587, STARTTLS)
- Android: you can also download our PageForYou Mail app from pageforyou.pl/pageforyou-mail.apk
How to create a mailbox
- First connect your domain in “Domain” — mailboxes are created on your own domain.
- Go to “Email” and click “New account”.
- Enter the address, e.g. office@yourcompany.com.
- Choose “Generate random” or “Custom password” (at least 8 characters). Write the password down — you won't be able to view it later, only set a new one.
- Done. Read your email in “Email → Open webmail”, on your phone or in Outlook.
What if…
I forgot my mailbox password
In “Email”, click “Reset password” next to the mailbox and set a new one. Then enter it on your phone and in Outlook too — the old one will stop working.
My phone or Outlook won't connect
Check that the username is the full address (office@yourcompany.com), not just “office”, and that the ports are 993 (incoming) and 465 (outgoing) with SSL. If it still doesn't work, send us a ticket with the program's name and the error message.
I'm not getting emails
Usually the domain isn't fully connected yet or the mailbox is full. Check your domain's status in “Domain” and how full the mailbox is in “Email”. If everything looks fine, send us a ticket and we'll check on our side.
Forwarding mail and auto-reply
In “Mail” → “Forwards” add the address that should receive your mail — tick “keep a copy” to keep it in your mailbox too. In “Auto-replies” enter a subject and text (e.g. out of office) and, if you like, from–to dates. It works right away: each sender gets the reply once a day. Switch it off with the same toggle.
I want to read email without installing anything
Go to “Email”, click “Open webmail”, pick a mailbox and enter its password.
Payments and your plan
In “Payments” you can see your plan and how long it's paid for, renew it and download your receipts. We never charge you automatically — you pay when you want to renew.
How to pay for or change your plan
- Go to “Payments”.
- Pick a period: monthly or yearly (yearly works out cheaper).
- Click “Choose plan” on the plan you want and pay by BLIK or bank transfer.
- Your plan starts working as soon as you pay.
- Download your receipt from the “Invoices and receipts” list. If we ask for your billing details, fill them in (for a business, the tax ID (NIP) is enough).
What if…
What's included in the plan?
Every plan gives you a website with an editor, hosting with the https padlock, email on your domain and backups. How much space, how many mailboxes and domains — it's all on the plan card in “Payments”. The domain itself (e.g. yourcompany.com) is paid for separately. Add-ons (e.g. a shop, bookings): those within your plan’s limit are included, each extra one costs 30 PLN/mo (324 PLN/yr with a yearly plan) and is renewed together with your account.
When do I have to pay?
7 and 3 days before your period ends, we'll email you a payment link. You can also renew early with the “Renew subscription” button in “Payments”.
My period ended and I didn't pay
Your account, website and add-ons keep working for 30 days after the payment deadline — during that time click “Pay again” in “Payments”. We remind you on day 10 and day 20 and 2 days before suspension. On day 30 the website goes offline, but you can still log in: for 14 days you can pay (the website comes back right away) or download your data in “Backups”. Then we delete the account and its data.
I need a receipt for my business
Fill in your billing details — your tax ID (NIP) is enough, we'll fetch the rest. The document will appear in “Invoices and receipts”, ready to download as a PDF.
My payment didn't go through
Try again from “Payments”, for example with a different method. If the money left your account but your plan wasn't renewed, send us a ticket in the “Billing” category with the date and amount.
Add-ons — what is included and what the rest costs
Add-ons are extra features for your website, such as a shop, online bookings, a gallery or a quote form. Each plan card in the pricing says which add-ons are included. Every further add-on costs 30 PLN/mo. It is billed together with your account: monthly with a monthly plan, once a year and cheaper with a yearly plan — 324 PLN/yr, with the same discount as the plan.
Example
- Start plan (9 PLN/mo) plus one add-on, for example online bookings: 39 PLN/mo in total.
- Start plan plus two add-ons: 69 PLN/mo in total.
- For any plan and number of add-ons, including yearly payment, use the “Work out what you will pay” calculator in the pricing.
How to switch an add-on on
- In “My website”, click the pencil (Edit) and open the “Add-ons” tab.
- Click “Install” next to the add-on. A paid add-on is free for the first 14 days.
- When you want to keep it, the order window shows the amount: for the whole account period or — if the period has already started — only for the days left until it ends.
- Pay. The add-on keeps working without a break, and next time you renew it together with your plan, in one payment.
What to do if…
I have a yearly plan but prefer to pay for the add-on monthly
In the order window, tick “I prefer to pay for this add-on monthly”. You then pay 30 PLN/mo, without the yearly discount. You can switch later next to the add-on.
My plan includes add-ons
The first paid add-on you switch on takes the free place in your plan — you pay nothing extra. You only pay for the next ones.
Where can I see what I will pay?
Before you pay, the order window shows the amount and the period. In “Payments”, the renewal amount covers your plan and all add-ons.
I want to remove an add-on
Click “Uninstall” next to it. Note: its data (such as products or bookings) goes with it, so make a copy in “Backups” first.
Late payment — what happens and how to come back
Nothing is switched off on the due date. For 30 days after the payment date your account, website and add-ons keep working, and we remind you by e-mail. Only on day 30 is the website switched off. You can still log in to a limited panel then: pay for the service or download your data. You have 14 days for that — after that we delete the account and data.
Timeline from the payment date
- Day 0 — the date has passed. Everything keeps working.
- Days 10 and 20 — e-mail reminder with a payment link.
- Day 28 — last warning: the website will be switched off in 2 days.
- Day 30 — website switched off, you log in to a limited panel.
- 14 days later — we delete the account and data. This cannot be undone.
How to bring your website back
- Log in as usual — you will see a notice with the date your data will be deleted.
- Click “Pay and restore” and pay by BLIK or bank transfer.
- Your website comes back as soon as the payment is booked, and the whole panel works again.
What to do if…
I only want to take my data
In the limited panel, click “Download your data” — you get a copy of your whole account to download. Do it before the deletion date.
I did not get a reminder
E-mails go to the address you log in with. Check your spam folder, and if the address is out of date, change it in “Settings → Account”. The payment date is always shown in “Payments” too.
What about my add-ons?
They work as long as your account does. You pay for them in the same payment as your plan.
I have a question
The limited panel has “Write to us”. You do not need to contact us to restore your website — the payment is enough.
The deletion date has passed
Deleted data cannot be recovered. You can sign up again — the builder puts a website together in a few minutes.
Files and backups
Your website's texts and photos live in the “My website” editor — you don't need to dig through files for them. Backups protect your website, email and files: if something goes wrong, you can bring back how things were on a chosen day.
How to make and restore a backup
- Go to “Hosting → Backups”.
- “Back up now” saves how things are right now — do this before bigger changes.
- To go back to a backup, click “Restore” next to it and tick what should come back: site content, photos, email or site files.
- Confirm by typing the word PRZYWROC exactly like that (it's Polish for “restore”). Before restoring, we'll save a copy of how things are now, so you can undo it.
- You can also download any backup to your computer.
What if…
I deleted something from my website and want it back
Restore a backup from a day when everything was fine and tick only “Site content” (and photos, if needed). Leave email unticked — otherwise you'll replace your current messages.
Where are my files?
Website photos and texts — in the “My website” editor. Your own files (e.g. an HTML site) — in “Hosting → Files”. Large files and archives — in “Hosting → Cloud”, if your plan includes it.
My IT person wants to upload files with FileZilla
The cloud connection details are in “Hosting → Cloud” (expand “For your IT person”), and the SFTP details for the website itself are in “Hosting → Files”. In FileZilla, choose the SFTP protocol.
I don't see any automatic backups
Daily automatic backups come with plans that include a private cloud. On any plan you can make a backup by hand with the “Back up now” button.
Tickets — how to ask for help
A ticket is a message to our team — the whole conversation stays in one place. We reply on working days, usually within a few hours.
How to send a ticket
- Go to “Tickets” — the “Write to us” button is on the Start page and in “Help”.
- Click “New Ticket”, pick a category and enter a subject.
- Describe what you want to do and what's happening: which panel page you're on, what you clicked, what message appeared.
- When we reply, “Tickets” shows up in the main menu with a counter. You reply in the same conversation.
What if…
My website is down
Send us a ticket right away and put your website's address in the subject. Add when it stopped working and what you see instead.
I don't know how to do something
Check the relevant Help section. If the answer isn't there, send us a ticket in the “Support” category and we'll walk you through it step by step.
It's urgent
Say so in the subject (e.g. “Urgent: email not working”) so we can see right away what matters most.
It's about a payment
Pick the “Billing” category and include the date and amount.
Missing something on your website?
If your website is missing a feature — such as an appointment calendar, a shop or another language version — tell us. We build new add-ons from exactly these requests, and each one comes straight to us.
How to tell us
- Click “Missing something on your website?” — the button is in the website editor (“Add-ons” tab) and in “Tickets”.
- Choose a topic, for example Bookings, Shop, Other website languages, or “Something else”.
- Write in a few words what you need and what for. It helps us get it right.
- Click “Send”. Your request is saved in “Tickets”, and we reply there.
What to do if…
I do not have an account yet
Use the contact form. There is also a “Write to us” link under the calculator in the pricing.
Maybe someone has already asked?
No need to check. We count similar requests — the more people need something, the sooner we build it.
When will it be ready?
We will reply in the ticket whether and when we plan the feature. We do not give a date before we know how much work it is.
Account and security
In “Settings” you can change your login password and email, and turn on extra protection: a code from an app on your phone when you log in (2FA).
How to keep your account safe
- Click your account at the bottom of the menu and choose “Settings”.
- “Security” tab: change your password — enter your current one and the new one.
- That's also where you turn on 2FA: scan the QR code with an app (e.g. Google Authenticator) and enter the 6-digit code.
- On the same tab you can see the devices you're logged in on, and log them out.
- “Account” tab: change your email address — you'll confirm it with a link sent to the new address (valid for 30 minutes).
What if…
I forgot my panel password
On the login screen, click “Forgot password” — we'll email you a link to set a new one.
I lost the phone with my 2FA app
Write to us at kontakt@pageforyou.pl from the email address linked to your account — we'll help you get back in.
Someone may know my password
Change your password in “Settings → Security” and log out all other devices. It's also a good idea to turn on 2FA.
I want to delete my account
Go to Settings → Account and click “Delete account”. Download a copy of your data from “Backups” first, then confirm with your password. We switch your sites off right away and delete the data after 14 days — until then you can change your mind by writing to us.
Hosting — for your IT person
“Hosting” in the menu holds the technical tools, each in its own tab: files and SFTP, PHP, databases, backups, scheduled tasks (cron), SSH keys, logs, statistics, cloud and ready-made apps. You don't need them to run a regular website.
What's in there
- My Files — your website's file manager; you can upload your own HTML site.
- Databases — for apps that need them.
- Marketplace — ready-made apps (e.g. WordPress) installed in one click.
- Cron — run a script at a time you choose.
- SSH — command-line access to the server.
- Logs and statistics — what's been happening on your website and server.
Before you change anything
- Open “Hosting” in the menu and pick a tab.
- Make a backup in “Hosting → Backups”.
- Make your change.
- Check your website. If something stopped working, restore the backup.
What if…
My IT person is asking for access
Don't give them your panel password. The website's SFTP details are in “Hosting → Files”, and you can add an SSH key in “Hosting → SSH keys”.
My website stopped working after a file change
Restore a backup from “Backups” with “Site files” ticked. If there was no backup, send us a ticket.
I'm running out of space
On the Start page, expand “Advanced” — you'll see your disk usage. Delete files you don't need or old backups, or choose a bigger plan in “Payments”.
My site needs a different PHP version or a higher limit
Go to “Hosting → PHP”. Pick the version your site needs (e.g. a plugin says “requires PHP 8.1”), or raise memory or upload size and click “Save” — it works right away. Each field shows what your plan allows; a bigger plan in “Billing” gives more. Sites on PHP 7.x must be updated first — open a ticket and we will help.
Heads up: changes to files, databases and cron can break your website. If you're not sure what you're doing, ask us in a ticket.